The original version of this essay first appeared in Matt’s iPhone app, Burning Man 2008: A Photo Essay. It was last updated after his trip to the playa in 2012 as a member of the Burning Man documentation team. Matt Freedman has been photographing Burning Man since 1999 and his photos from 2012 can be seen on the Matt Freedman Photography Facebook page.
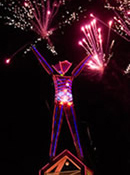 Burning Man is one of the most photographically rewarding — and challenging — places you will ever visit. Just protecting your gear from the harsh desert conditions can be challenge enough. To bring home the kinds of images that will stand up in comparison with your memories, you will also have to master lighting, composition, and technique —for photography in general, and for Burning Man in particular. And you will also have to understand the unique social contract between photographers and event participants. On this page I try to help you do that, by sharing some of the insights and techniques I have developed after ten trips to the playa.
The Equipment section covers what to bring, how to care for it, and how to carry it. The Shooting at Burning Man section covers the when, where, and how of Burning Man photography. None of this is carved in stone, and I would love your feedback on it. If you have any comments, questions, or suggestions for future revisions of this section, please contact me at www.silentcolor.com (where you will also find my Burning Man Links and Burning Man Packing List pages which contains links to many of the items that I talk about here). You should also start any journey of photography at the event with a visit to the Burning Man Image Use page for full information on the event’s policies and procedures for use of imagery. By entering the gates of Burning Man you agree to abide by these policies, and knowing them will help you avoid legal pitfalls and keep you in the good graces of your fellow participants.
But before we get to the Equipment, and Shooting at Burning Man sections, a few words on photography rules and etiquette at Burning Man (which are in fact carved in stone)…
Rules and Etiquette
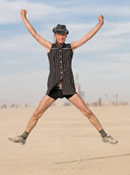 Burning Man’s number one rule of etiquette for photography is Ask First — you should get permission before taking somebody’s photo. Does this mean you can’t grab a shot of somebody cruising by on a really cool bike, or capture a compelling scene you happen to see through your telephoto lens? No, of course not — realistically, you should ask first whenever realistically possible. But the question you have to ask yourself before pressing the shutter is “Am I invading this person’s privacy in any way?”. If the person is fully or partially nude, in the middle of a very private moment, or doing anything that perhaps they would not want the whole world to see, then yes, you definitely need to ask first — do not press the shutter. If somebody is doing henna body painting on a nude model in Center Camp, and there are a dozen people with cameras surrounding them snapping away, can you just jump in and take pictures as well? No you can’t — instead, set an example for the others. Go up to the model and ask first. Some of the other photographers undoubtedly already did so, and the ones who did not perhaps will appreciate the reminder that they should have.
Ask First is Burning Man’s number one photography rule — but I have my own official number one photography rule for you as well, which is Don’t Be “That Guy”. If you have been to Burning Man you know which “that guy” I mean — that guy in a paparazzi swarm chasing after every naked woman who walks by, like she was an A-list celebrity with a new haircut. That guy with the giant telephoto lens elbowing people out of his way to get his close-up boob shots at the Critical Tits ride. In other words, that guy who over the last few years has been making women in particular feel less and less comfortable freely expressing themselves at Burning Man, for fear they will end up as the screensaver on their officemates’ computers. And yes, it is predominantly guys causing the problem, but female photographers obviously need to keep basic photographic etiquette in mind in as well.
Burning Man’s legal policies about use of imagery define “professional use” as “any use beyond personal”: you accept these terms — printed on the back of each ticket — when you set foot inside this private event. If you are planning on using your photographs for any purpose other than simply sharing with friends and family, you must obtain written permission from Black Rock City LLC, the organization that runs Burning Man. You need to register with them in advance of the event, and check in upon arrival to sign a Use Agreement and have a media tag put on your camera. To learn more about Burning Man’s specific media policies, check out both the Rights and Responsibilities section and the FAQ Page of the Burning Man Press Page.
One of the more important things you will notice on that page is that you need to collect model releases from recognizable people that you photograph (again, this is for commercial use only — if you are only shooting for yourself, friends, and family, getting verbal permission is enough — you do not need a signed release). So make sure you bring plenty of releases with you. Having to get releases signed definitely slows down your shooting. But on the other hand, some of my best interactions with people at Burning Man — and some of my best friendships there — have started with conversations that initially began with me asking somebody to sign a release. Believe it or not, the process of getting a release signed can help you transition from just recording the event to truly participating in it.
Equipment
Camera
My first two years seriously photographing at Burning Man I just brought a simple pocket digicam (Canon S40 and then S50), and I definitely got pictures I was very happy with. Some of my photographs from those years were even printed at up to 40″ for a major photography exhibit. However, by the time I wrote the original version of this essay in 2009, it was clear to me that doing serious shooting at Burning Man (or anywhere else, really) required a digital SLR. But technology marches on. Though I do still shoot primarily with a DSLR myself — and that is the perspective that this essay is written from — there are now other options worth considering. In particular, some of the new compact mirror-less interchangeable lens cameras now produce images essentially as good in quality as a cropped sensor DSLR (the Olympus OM-D E-M5 comes to mind in 2013). And even some large sensor pocketable cameras can do amazing things now (the Sony RX100 was the first of these).
If you bring an interchangeable lens camera, I highly recommend getting one that has a self-cleaning sensor — this gives you much more freedom to change lenses in the dusty conditions of Burning Man. And given those conditions, it is also best to have a body with good weather sealing. If you have a second camera body I recommend bringing it as backup — every Burning Man is a unique once-in-a-lifetime experience, and if something terrible happens to your primary camera you will want to have a backup. I also recommend a pocket digicam (preferably a large sensor one) that you can bring with you when you don’t want to lug around the DSLR (and that of course can be your backup if you do not have a second DSLR body).
In 2012 I brought a Nikon D300 as my primary body, and the Sony RX100 as digicam. That combination worked great, and I was very happy with the images I got. That being said, at the end of 2012 I upgraded to the Nikon D800 full frame SLR, and the image quality is so vastly improved that it makes me want to go back and re-shoot every image I have ever taken.
Lenses
Lenses are an extremely personal choice, and you can make a pretty good argument for the use of almost any kind of lens at Burning Man. A consumer zoom with a wide range is awesome, because you can minimize lens changes and weight, and very quickly go from shooting wide angle to telephoto. But the image quality of a set of professional f2.8 zoom lenses may be worth the weight and lens-changing disadvantages to you. And prime (non-zoom) f1.4 or f1.8 lenses generally have the best quality of all, and are fantastic for shooting at night. You also might consider specialized lenses like an ultra wide zoom or fisheye.
Another drawback to consumer zoom lenses is that they are typically not weather-sealed, so even if you are using one with a sealed professional camera body, the lens can still draw dust into itself and/or the camera.
Accessories
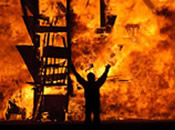 Tripod Absolutely worth bringing, but I must admit I have not used mine very much at Burning Man. I have found that it was such a hassle to carry around that it was not worth it, and the majority of subjects you would want to take pictures of at night are moving, so you need a fast exposure anyway. The large majority of my night shots are with the 50 f1.4 lens at extremely high ISO (or in 2012, with the Sony RX100, which has an F1.8 lens and good high ISO performance). On the other hand, I have seen plenty of mind-blowing Burning Man photographs by other people that were shot on a tripod, so definitely don’t let me discourage you.
External Flash Definitely worth bringing one, especially for fill flash at twilight (takes some skill to do this right though).
Polarizing Filter I do not find them particularly useful at Burning Man — it is just one more piece of glass in the image pipeline that has to be kept clean. In my opinion, the only really good reason to use a polarizer is to cut glare — which is generally on water or foliage, neither of which are in abundant supply on the playa. Many people use them to make the sky bluer. If you do that you need to be very careful about not doing it with too wide a shot, or you will get very unnatural looking color differentials in the sky. If I want a bluer sky I will do that in post-processing, and skip the polarizer. All that being said, the polarizer does impart a different look to certain subjects, so if you have one you might want to bring it to play around with.
Storage Flash memory cards are very cheap now. Bring plenty of them — enough so that you do not have to erase and re-use them before you get home. I would also highly recommend that you bring a backup device. If you are not willing to risk your laptop out there, perhaps a portable hard drive card reader of some sort — there are plenty of options on the market. But remember this is for backup, not for primary storage. I would definitely not copy my cards to a hard drive then erase the originals — you should have at least two copies of your images, if at all possible..
Cleaning Supplies Bring sensor cleaning equipment even if you have a self-cleaning sensor — you never know when you are going to get a stubborn piece of sensor dust (and don’t forget to inspect for dust regularly —I got a huge piece of dust stuck on my sensor halfway through the event in 2012, and did not see it until I got home. I had to clone that thing out of way too many photos). For cleaning lenses, I really like the “Lens Pen” — I bring a few with me, in case they get too cruddy from the dust. Note that they are available in regular size for SLR lenses and micro size for digicams. There is a product called Deoxit, which is sometimes handy for cleaning the contacts between lens and camera or between battery and camera (I wish I had remembered to bring it the year the auto-focus stopped working on one of my lenses due to cruddy contacts). I generally use baby wipes to clean the outside of the camera.
Misc Supplies Don’t forget plenty of batteries, and your chargers (and know where you are going to plug in — Burning Man is BYO electricity). I like to have spare lens caps and spare LCD covers with me as well.
Carrying and Protecting Equipment
 The smartest thing you could do as a photographer is build and register a small personal art car so you could easily travel around the playa with your gear. The only way you can drive at Burning Man is if you have a bona fide “mutant vehicle” — a vehicle that has been significantly modified from its original form and turned into a work of art. These vehicles must be registered well in advance of the event, so check out the official DMV (Department of Mutant Vehicles) information for details.
If you are not going to bring an art car, the next best thing to bring is a good mountain bike. The common wisdom is to bring a crappy playa bike that you don’t have to worry about trashing. I personally cannot stand riding crappy bicycles ever, and especially not in the difficult conditions of the playa. I recommend a decent full suspension mountain bike — make sure you are religious about locking it, and accept that you may have to spend some money to get it thoroughly serviced when you get home. It is money well spent in my opinion.
When carrying photo gear at Burning Man (or really anywhere) there are four main considerations: comfort, transportability, accessibility, and protection. Simply carrying a camera on a shoulder strap with accessories in a small fanny pack offers good comfort, ok transportability on foot, but terrible on bike, fantastic accessibility, and zero protection. Putting everything in a photo backpack offers excellent comfort, excellent transportability, mediocre accessibility, and excellent protection. There is a huge range of options in camera bags, and there is no one system that is excellent in all four criteria.
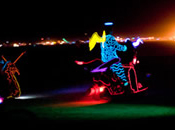 After many years of experience, I believe I have finally figured out the optimum way of transporting an SLR and lenses around Burning Man. The secret is a high quality front basket on your bike. Keep your gear in a backpack or whichever well protected, well sealed bag you like, and plop it in the basket. This keeps it safe, and causes no discomfort when carrying it.
That being said, if you have a heavy camera bag, putting all that weight in the front does make the bike pretty squirrely, which is all the more reason to have a high quality bike, and good handling skills.
If you have an SLR, I also recommend investing in a good after-market strap for it. I prefer the “sling” style straps (invented by BlackRapid). With one of those straps you can ride with the camera on your body (with the backpack in the basket on standby in case of dust storms).
As far as protecting your camera from the dust, I generally only take my camera out of its bag when the dust is not up. Though as the week goes on, I tend to get looser and looser with that rule (though I still am afraid to pull out my camera during a real dust storm). As mentioned earlier, you really want to look at how weather sealed your camera and lenses are. The less sealed, the more careful you will want to be about when to pull them out of the bag.
An underwater housing would of course provide great protection, but good ones are going to be more expensive than your camera, and add significant weight and bulk.
Shooting at Burning Man
Creating great photographs anywhere requires mastery of three elements: light, composition, and technical aspects. This is something I learned at a workshop with Thom Hogan, and it has proved invaluable to me. I will touch on how each of these apply at Burning Man…
Light
 Morning
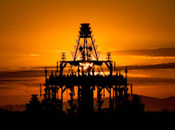
My favorite time to shoot at Burning Man is sunrise — which means being in position for your sunrise shots no later than about 6:15am. For one thing, unlike at sunset, you can get shots of the sun actually crossing the horizon. Due to the location of Burning Man, the actual sunset is blocked by the mountains, but sunrise is not. However the exact location of Burning Man in the Black Rock Desert sometimes changes slightly from year to year, so don’t count on this. Once the sun is up, the light is absolutely magical. This is generally the calmest time of the day, so there are few dust storms, and it is not hot yet. Though there are plenty of people around who have been up all night, there are far fewer than there are during the day, so it is easier to get shots of art pieces without people in the frame. This is definitely a time of day when you generally want to be shooting out on the open playa.
Daytime
By 9am the light is not nearly as good, and it is starting to get hot. Obviously great shots can be made any time during the day, but it is much harder to get them when the sun is high. Midday is a good time to be shooting indoors — at Center Camp, inside various other domes and structures, etc. This is also a good time to be scouting locations — where do you want to be for the next sunset and sunrise? What art pieces do you see that you love? What direction will the light look best on them, and when will that happen? You might consider giving yourself a break and leaving the DSLR at camp during midday outings, and just bring your small digicam.
On the other hand, you just never know when dust or bad weather is going to move in, so there is something to be said for going out at mid-day if it is calm, just to get some shots in the bag in case the weather goes to hell. For example, in 2000 it was overcast, windy, and dusty pretty much continually from Wednesday on.
Late Afternoon
By 4pm the light is starting to get interesting again, by 5pm it is spectacular. Anything and everything looks good in this light. The major art pieces tend to get crowded with visitors this time of day, which can make them more challenging to shoot.
Dinner Interregnum
At just after 7pm the sun slides behind the mountains, so you lose the “golden hour” light prematurely. The sky is suddenly much brighter than everything on the playa, which is no longer being lit, so you really have to be careful how you frame your shots. This can be a good time to take people portraits, because there is a nice even diffuse light, and your subjects will not have to wear sunglasses or squint into the sun, but again, be very aware of how bright the background is compared to your subject — you may need to use fill flash, or shoot in a different direction. This is also a good time to eat a quick dinner.
Sunset
Around 8 the real sunset is starting to happen, even though you cannot see it. However, if there are clouds to the west there can be absolutely spectacular skies. You no doubt scoped out what you wanted to put against those clouds earlier in the day, so now you are in position to get your sunset sky shots. Experiment with silhouettes against the sky, as well as fill flash.
Twilight
As the daylight starts to fade, the artificial lighting starts to come on. It is now dark enough to see the glowing lights, but light enough that you can still see the people, vehicles, art, etc. that have lights on them. This is a great time to break out the 2.8 zooms. It is a very technically challenging time to shoot — keep a close eye on your shutter speeds.
Night
Nighttime at Burning Man is absolutely spectacular, and very challenging to shoot well. You can lug a tripod around which gets annoying very fast if you do not have an art car, or you can rely on a very fast lens (f1.4 preferably) and high iso. Ideally you have both. A flash can be helpful, but in my opinion, only if you are using it in slow synchro mode, and you have enough ambient light for that mode to be interesting. You also have to consider how irritating your flash might be to those around you.
In order to ensure that you participate and enjoy the event in other ways, it’s recommended that you also take time to go out and explore without your camera.
Composition
 The basic rules of composition certainly do not change at Burning Man, so I am only going to touch on this subject here. There are plenty of resources available for learning this stuff, and I have included links to some of my favorites in the Burning Man Links page on my website.
I think the biggest single mistake beginning photographers make is not paying enough attention to what is in the background. They see something that catches their interest, and grab a shot of it, without really looking to see what else is in the frame. I personally tend to be drawn to very clean sparse backgrounds, which means I do most of my shooting at Burning Man out on the playa. The streets and theme camps tend to be too visually cluttered for me, with undecorated cars and RV’s etc. bringing reminders of the real world into the magic I am trying to capture.
When you are out on the playa, look at where the horizon is in your shot. Would it look better if you crouched down to lower it? What if you laid on your belly in the dust? What if you climbed up on something and shot downwards, and raised the horizon? What focal length do you want for a shot? Wide angles bring much more of the environment into the frame with your subject. Telephoto lets you more easily include only exactly what you want in the background. Try to experiment — do not take all your shots from eye level at standard viewing distance. Try to get a unique perspective.
Technical Aspects
 The most important rule here is Know Your Equipment! Burning Man is not the place to learn how to use the fancy new camera you just bought. If you are getting any new equipment for your trip, make sure you get it sufficiently early that you can really learn how to use it before you arrive. Trust me, you are not going to read the manual when you get there.
Beyond that, I am not going to get into the technical aspects of photography in general, but I will leave you with one important word: raw. If you are at all serious about your Burning Man photography, you need to be shooting raw format files, not jpeg. There are just so many things you can get wrong in your shot that can easily be corrected after the fact with raw-processing software, and which, if you are shooting jpeg, mean you have lost the image. Even the best camera metering systems can be fooled by the brightness of the playa during the day, or the rapidly varying intensity of light from a fire at night. With a raw file you can move the exposure up or down a stop or two and often save an otherwise ruined shot. Similarly, being able to change your white balance after the fact can be a godsend. With the cheapness of flash memory cards and hard drives these days, there is just no excuse for shooting jpeg anymore.
Becoming an expert in the technical aspects of post-processing your photos is just as important as mastering the techniques of creating them. I provide some suggested links for getting started in both of these areas in the Burning Man Links page on my website.
If you have any feedback about this document, please contact me at www.silentcolor.com with your questions, comments, and suggestions.


